Restore Cooling and Warming on a Coleman Thermoelectric Cooler: Build a 12V Polarity-Reversing Adapter
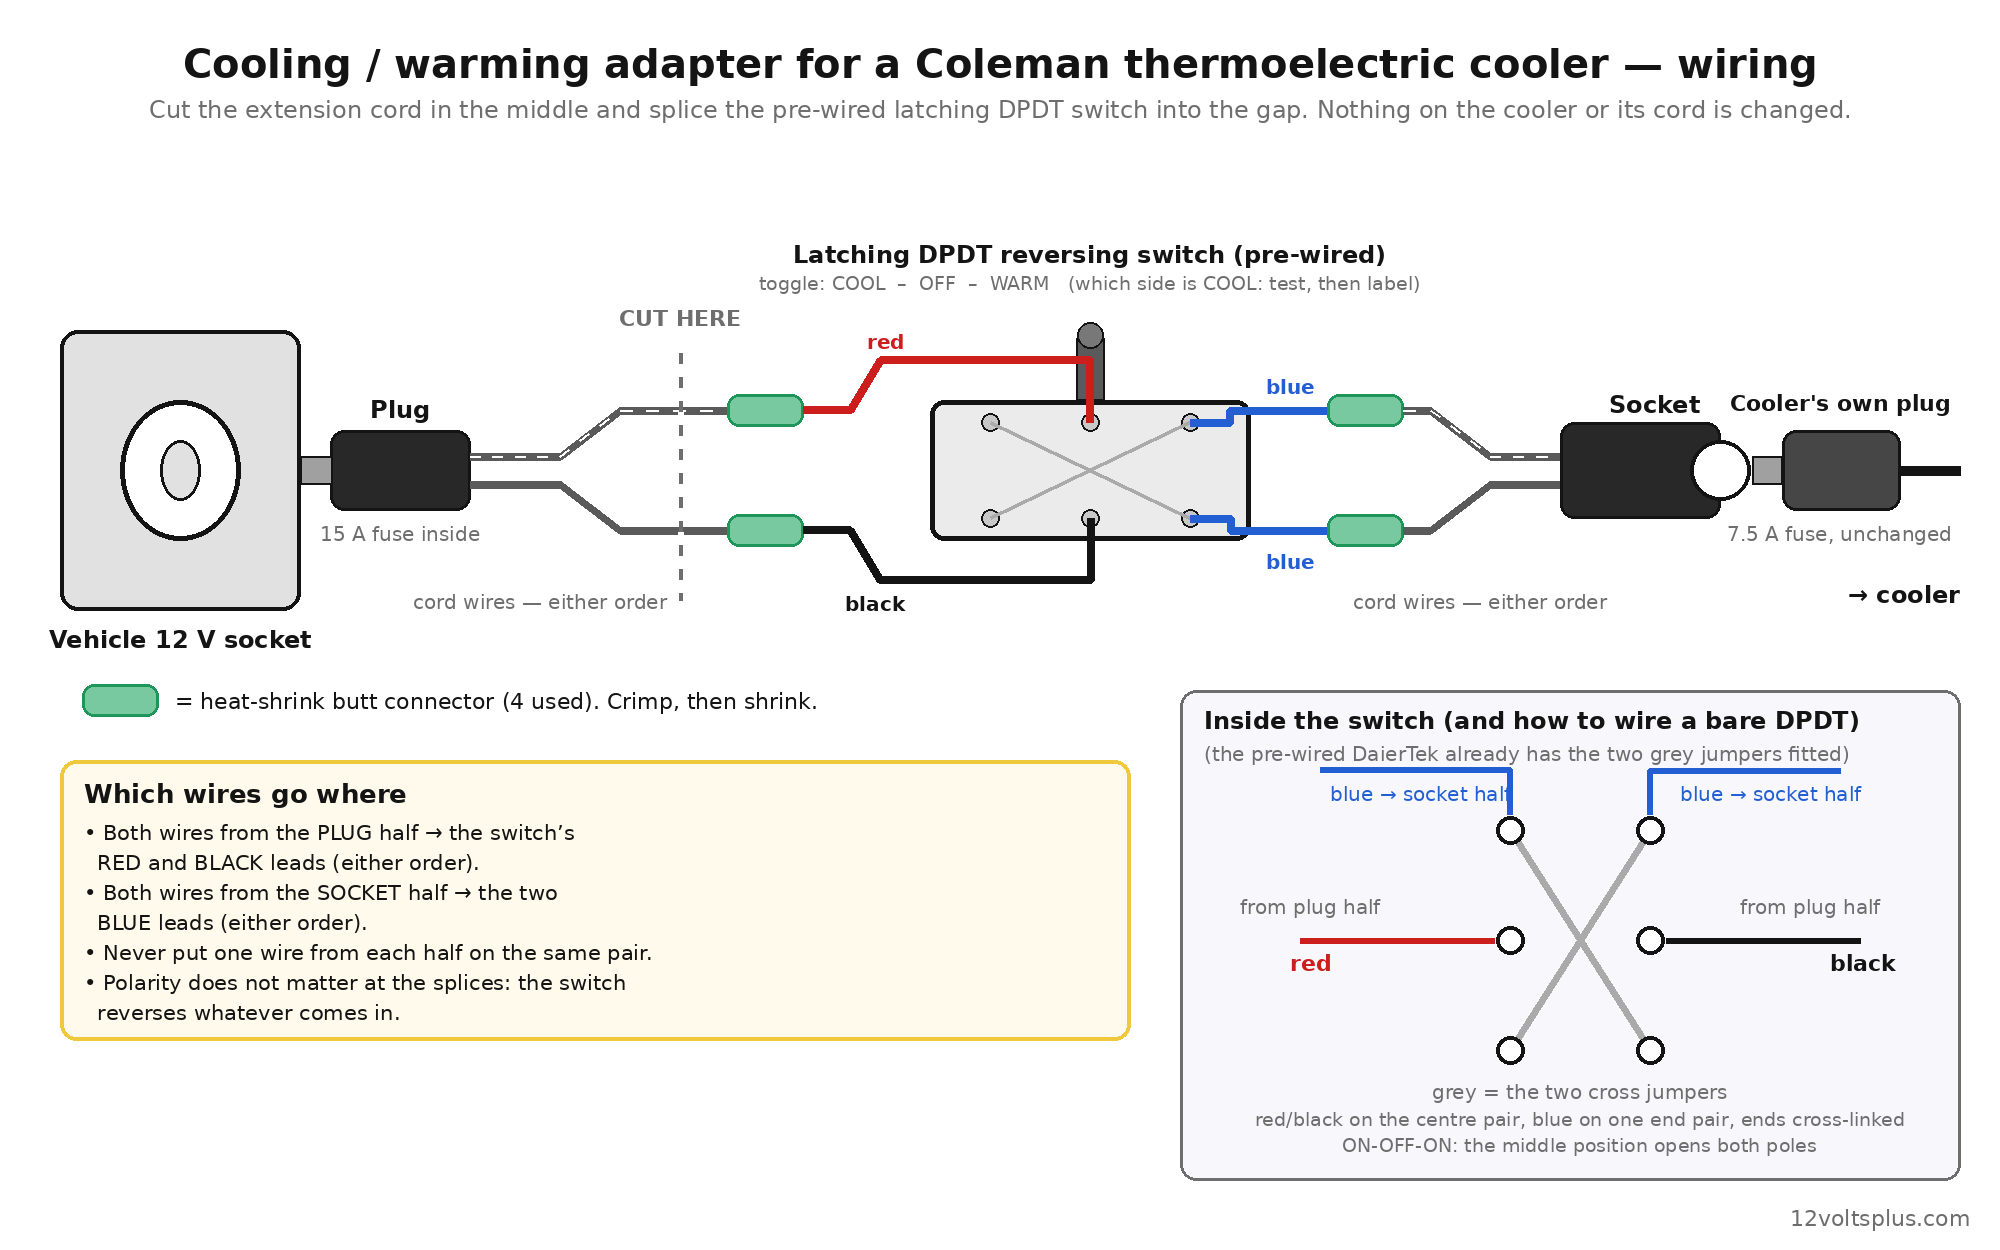
Coleman thermoelectric coolers can cool or warm: a Peltier module simply swaps its hot and cold faces when you reverse the supply polarity. The discontinued two-piece cords (3000005309, 5010001228) did that with a reversible connector. The current replacement, the 5010003953, is a single fused cord and runs the cooler as a cooler only. This guide builds a short plug-in adapter — a 12 V extension cord with a reversing switch spliced into it — that goes between the vehicle’s socket and your existing cooler cord: vehicle socket → adapter plug → switch → adapter socket → the cooler’s own plug. Nothing is hardwired and nothing on the cooler is touched.
- About $28 in parts and twenty minutes with a crimping tool
- Entirely plug-in: the adapter has a plug on one end and a socket on the other, so it travels with the cooler
- One toggle: COOL – OFF – WARM
- Only for coolers that shipped with the reversible two-piece cord (model list below)
Key takeaways
- Polarity is the whole trick A thermoelectric (Peltier) cooler warms instead of cools when + and − are swapped. Coleman’s old reversible connector did exactly that; a DPDT switch does the same thing.
- Latching, not momentary Almost every “reverse polarity switch” on Amazon is momentary, made for RV jacks — it springs back to off. You need a latching ON-OFF-ON switch that stays in COOL or WARM.
- No cooler modification The adapter sits upstream of the cooler’s own fused plug. The cooler, its cord and its fuse are all unchanged, so nothing about the cooler’s warranty is affected.
- You don’t need to identify + and − The reversing action is symmetric. Keep the two wires from the plug half together and the two from the socket half together; which position is COOL is found by testing, then labelled.
Only coolers designed for reversed polarity. Coleman models that originally shipped with the reversible two-piece cord — 5645, 5615, 5640, 5641, 5642, 5644-707, 5644-710, 5644-760, 300000540, 3000001497 and the other units the 5010003953 cord fits — have fans and internals built to run either way round. Do not use this on other brands or on a cooler that never had a warming mode: many brushless fans will not run on reversed polarity and some control boards are damaged by it.
Warm mode heats the interior to roughly 40 °C / 100–140 °F. Empty the cooler of anything perishable before switching, and pass through the OFF position and pause a few seconds when changing direction.
Three parts, about $28


Build the adapter
-
Cut the extension cord in the middle
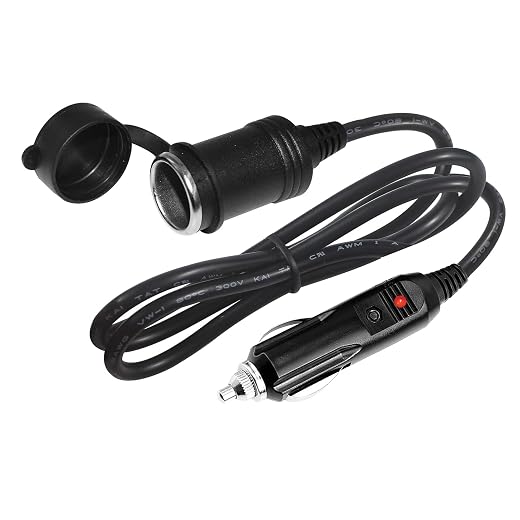
With nothing plugged in, cut the 3 ft cord at its midpoint. You now have a plug half and a socket half, each with two conductors. Separate the two conductors about 25 mm (1 in) back from the cut and strip 8–10 mm (3/8 in) of insulation from all four ends.
-
Sort the switch leads by colour
The pre-wired switch has four leads: one red and one black, which leave from the middle of the long side, and two blue, which leave from one end. Red and black are the supply pair; the two blues are the load pair. So: both wires from the plug half go to red and black; both wires from the socket half go to the two blues. Within a pair the order does not matter, and the cord’s own wire colours do not matter — the switch reverses whatever comes in. The one mistake to avoid is putting one wire from each half onto the same pair. The wiring diagram after these steps shows it.
-
Crimp and shrink the four joints
The switch leads are 14 AWG and the cord is 18 AWG, so a blue 16–14 AWG connector fits the switch side snugly and the cord side loosely. Fold the stripped end of each cord conductor back on itself so it doubles up and fills the barrel, then crimp. Warm the sleeve with a heat gun (or carefully with a lighter) until it shrinks and a little adhesive shows at the ends. Tug each joint. Four joints, done.
-
Fit the boot and tidy the switch
Screw the waterproof boot onto the toggle. The switch can hang in the cord loop, be zip-tied near the socket, or be mounted through a hole in a small project box if you want it neat. Keep the splices from resting on anything hot.
-
Test and label COOL / WARM
Plug the adapter’s plug into the vehicle socket, plug the cooler’s own cord into the adapter’s socket, and flip the toggle to one side. Within a minute or two the interior plate is clearly cold or clearly warm; the fans run in both positions. Label the two positions COOL and WARM — the centre is OFF. To move the cooler to another vehicle, unplug the adapter and take it along like any extension cord.
The cooler’s own plug still carries its 7.5 A fuse and stays in the circuit; the extension cord’s plug adds a 15 A fuse upstream. At about 4 A the cooler runs every part of this adapter at a fraction of its rating.
Will reversing polarity damage my cooler?
Not on a Coleman model that originally came with the reversible two-piece cord — those coolers were designed to run either way round, and the old connector reversed them exactly as this switch does. On coolers or brands that never had a warming mode, it can: brushless fans may not run and some control boards are not protected. If in doubt, check whether your model ever shipped with a warming mode before building this.
Why not just swap the spade connectors at the cooler end?
You can — the current cord’s two spade terminals can be swapped by hand, and that is what the 5010003953 product page describes. It works, but it means opening the cooler’s connection every time you change modes. The adapter makes it a flick of a toggle and leaves the cooler connection alone.
Does anything have to be hardwired?
No. The extension cord this build uses has a cigarette-lighter plug on one end and a socket on the other, so the finished adapter plugs into the vehicle and the cooler plugs into it. If the cooler lives permanently in a boat or RV, a socket lead with ring terminals bolted to the battery is the hardwired alternative — the switch wiring is identical.
Do I have to find which wire is positive?
No. The adapter reverses whatever comes in, so the input polarity does not change how it works. Keep the plug-half wires together and the socket-half wires together, then find COOL by testing.
Can I use one of the cheaper momentary reversing switches?
No. Momentary switches spring back to the centre (off) as soon as you let go — they are made for raising and lowering RV jacks. The cooler needs a latching switch that stays in position for hours.
How warm does warm mode get?
Coleman rates the warming side at roughly 100–140 °F (about 40 °C) depending on ambient temperature. It keeps food warm; it does not cook. Empty anything perishable before switching from cool to warm.
Does this affect the cooler’s warranty?
The cooler and its cord are not modified in any way — the adapter is a separate accessory plugged in upstream, exactly like an extension cord. Check your own warranty terms if the cooler is still covered.
Bottom line
A Coleman thermoelectric cooler never lost the ability to warm — only the connector that made it easy. A latching DPDT switch spliced into a cheap extension cord restores it for about $28, without a single change to the cooler or its cord.